
When we started using Microsoft APP-V to deploy our software to our users we discovered that even though the process was incredibly easy and fast there was a small problem in identifying the desktop shortcuts of the legacy apps from the APP-V apps. We noticed that you could not tell (at a glance) which desktop shortcut was an app-v app and which was not.
Many users had loads of desktop shortcuts, so when we used to tell them to refresh their app-v client (logging off and back in to their machines), the new updated shortcut would appear on the desktop. But there was no way for them to see which desktop shortcut was the updated one as the legacy shortcuts were still installed manually on the machines. For them “Business Objects XI” was the same as the app-v “Business Objects XI”.
We had a wee think about it and started investigating how we could tweak the shortcuts. We tried playing around with the shell of Windows but this would still not solve the shortcut problem as this would only show app-v icons as desktop shortcuts. So what to do?
Enter: Greenfish Icon Editor Pro. This [FREE] application allows you to edit, change or create your very own shortcuts on-the-fly! All you need to cook this up are the following ingredients:
- the original sequenced app desktop shortcut icon
- an identifier image that will be placed on top of your desktop shortcut
- the APP-V 256 bit icon
- the amazing Greenfish Icon Editor application
STEP 1 – Create the APP-V icon template
Open Greenfish Icon Editor, then go to File> Open… find the app-v icon in C:\Program Files\Microsoft Application Virtualization Client folder, find the sfttray.exe icon and select it to open in Greenfish.
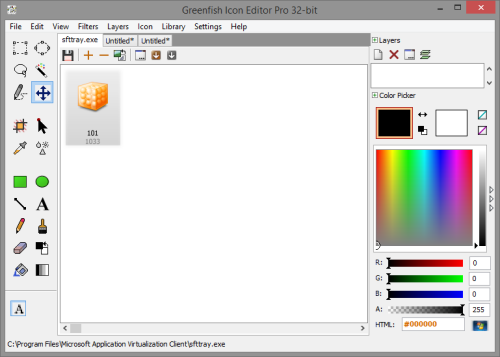
This icon will appear in the Greenfish window, double click the icon to open the icon files stored in the exe and select the one called “256 x 256 @ 32bit”. This is the identifier image that will appear on all the shortcuts when app-v deploys them to the desktop. Press CTRL+A to select the entire icon. Then press CTRL+C to copy the selection to the clipboard.
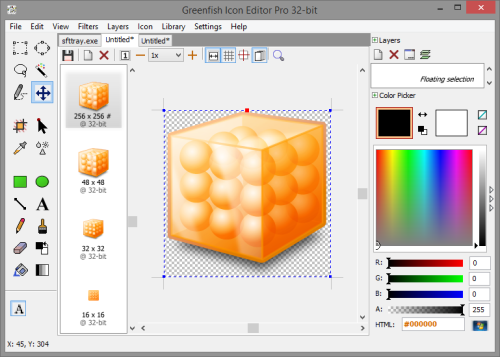
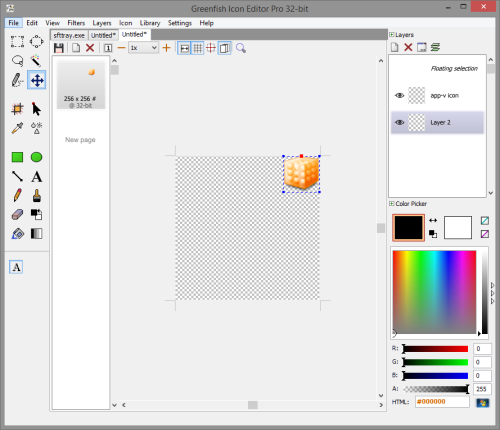
Go to File> New graphic… and press CTRL+V to paste the icon into your new template. Obviously, this is too big and will cover the original shortcut icon, so all you need to do now is press CTRL+T (or Edit> Transform> Transform selection…) – Type 64 for both Width and Height pixel boxes as shown below:
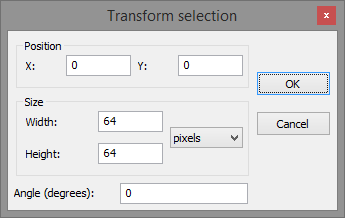
Click OK to confirm the setting.
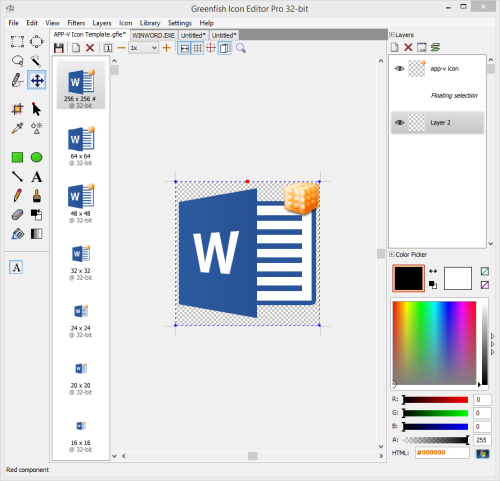
The icon will drop down to a reasonable size and allow you to drag it around the icon area where you think will be the best place for it to appear. We have selected the top right corner for our shortcuts as we think it is the least hindering area for the shortcut (see below image).
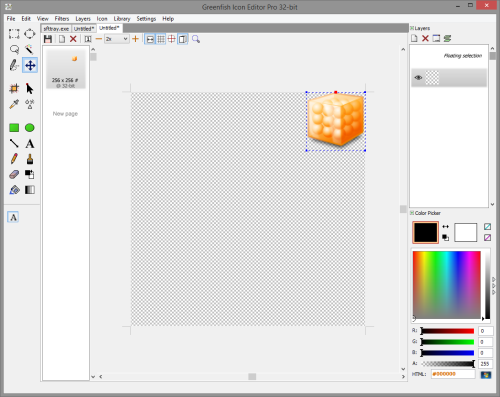
Great! Now all we need to do is name this layer APP-V icon, add a new layer and save this as a GFIE file.
So now in the top right pane where the header is called “Layers”, double-click on the layer underneath where it says “Floating selection” and rename it to “APP-V Icon”.
Now click on the first icon that looks like a blank document underneath the “Layers” header. This will add a new layer to your list (just like Photoshop). Drag this layer underneath your APP-V Icon layer. This is where the original icon will appear.
Save this as your template by going to File>Save… choose Save as type: .gfie/.gfi and name it “APP-V Icon Template”. Click Save to the folder of your choice.
STEP 2 – Making the APP-V Desktop Shortcut
Now that you have created your custom Greenfish icon template you can import any application desktop shortcut icon you are sequencing, save it as an .ico file and then add it to your app-v content icon folder. Job done!
Cool! So I am going to use the Microsoft Office 2013 Word desktop icon in this example.
Simply open up your app-v icon template .gfie file. Then go to File> Open… and find the path of your sequenced application. I opened up C:\Program Files\Microsoft Office\Office15 and selected WINWORD.EXE, which gave me the following screen:
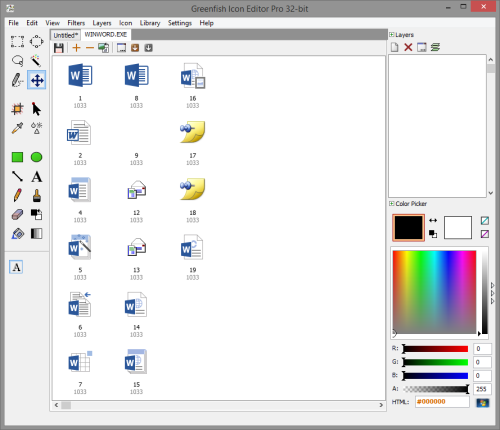
I then double-clicked on icon number 8, found the highest bit rate (in this case “256x256 @ 32bit”) and then selected it. This icon will open a new window where you will be able to view it properly. If you think this is good enough for your new shortcut then select it by press CTRL+A, click on your icon template tab on the top left where it says “APP-V Icon Template” and paste the icon in the layer underneath the “APP-V Icon” layer.
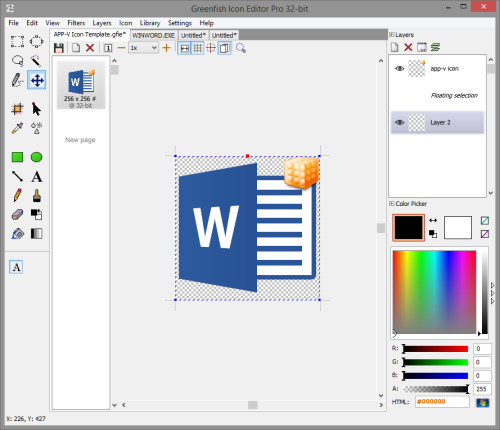
Gotcha: If it looks too small, you can resize the icon using the Edit>Transform>Transform selection… command. However, you will need to set the width and height to 256 pixels or else the icon will look deformed.
Good! We are soon done. Once you are happy with the end result you will need to add the different sizes for the shortcut (these are the sizes used in the File Explorer for viewing the icon).
Left click in the left pane where it says “New page” and select 64 x 64 (large) from the Size pull down menu then click OK. Do this again for all the sizes down to 16 x 16 (smallest). You will now notice that the sizes will appear underneath each other as a preview.
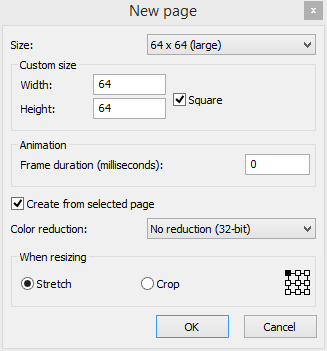
Gotcha: If you edit any of the different sizes or the main icon, you will need to do this step again or else the icon will be showing different versions at different sizes. So if you go to re-edit, just delete the icon pages and follow this step again. (I wish Greenfish would make a button to just add all the sizes in one go as it would make for lighter work…)
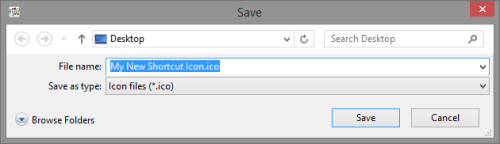
Final step: Save this by going to File> Save As… Use Save as type: .ico and save it to your folder of choice.
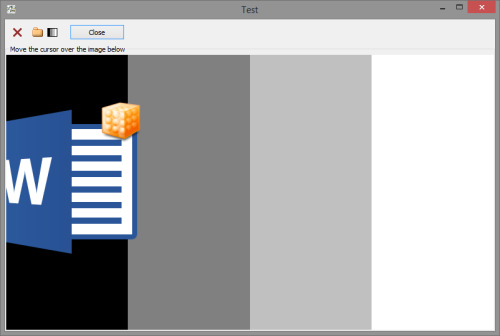
You can also create your own icon designs or resize, change the background using the supplied tools. One cool addition to this app is that you can test your icon on test backgrounds. Just go to Icon>Test… (Shift+Ctrl+T) and move your icon about to see if there are any icon display issues.
Now when you use these icons, the user will be able to identify the difference between the legacy app and the APP-V app. This is one process I wish Microsoft could add to the sequencer in the future.
Happy Icon creating! :)
ps. You can use Greenfish for your other deployment apps too! Here is the download link: http://greenfishsoftware.blogspot.co.uk/2012/07/greenfish-icon-editor-pro.html

Comments