
Configuring Microsoft Exchange 2013 for K1000 Email Flow
The following guide provides the steps necessary for getting email flow working to and from the K1000 in an Exchange 2013 environment. Please note that the information below does not indicate official documentation or support, however some of this may be accurate.
As usual, hope that helps! ^_^
John
______________________________________
1) Configure an SMTP server on the K1000
2) Specify email addresses in the Queue Configuration page of the K1000
3) Create an Exchange mailbox for the specified K1000 Alt. Email Address
4) Create an Exchange contact for the specified K1000 Email Address
5) Create an Exchange rule to redirect all messages from the K1000 mailbox to the K1000 contact
6) Create a send connector to route Exchange contact email to the K1000
7) Create a receive connector so messages from the K1000 will be delivered
Related items:
8) Test email flow to the K1000
9) Hide an Exchange 2013 contact from the Global Address List (GAL)
_____________________________________________________________________
1) Configure an SMTP server on the K1000
The first step in configuring K1000 email flow is to browse to the Settings > Control Panel > Network Settings page. If an SMTP server is not already configured, enable the Use SMTP Server option and specify the IP address of the Exchange 2013 server in the SMTP Server field, being sure to enclose the IP address with brackets […]. Finally, apply the changes by using the Save button and reboot the K1000 when prompted.

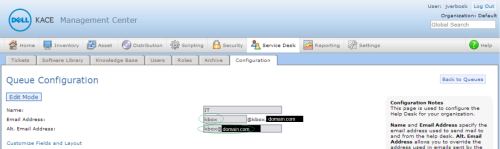
2) Specify email addresses in the Queue Configuration page of the K1000
Next in the K1000, navigate to Service Desk > Configuration > Queues and select the first queue for which you wish to enable email flow.

From the Queue Configuration page, specify the target Email Address and Alt. Email Address to be used for the Exchange contact and mailbox (respectively). The latter allows email to/from the K1000 to appear local to the domain. Once populated, click on the Save button at the bottom of the page to apply the changes, and then prepare for the Exchange 2013 configuration.
3) Create an Exchange mailbox for the specified K1000 Alt. Email Address
The steps below assume the following regarding the Exchange 2013 server:
- An Exchange 2013 server with both Mailbox and Client Access roles will be used
- No user account, mailbox or contact exist for the K1000
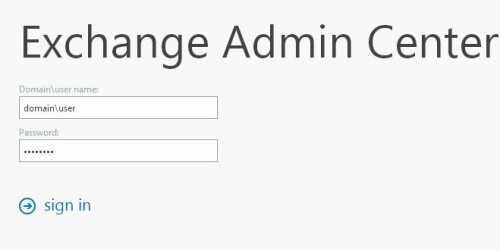
First, log into the Exchange Management console via: https://exchange/ecp/default.aspx
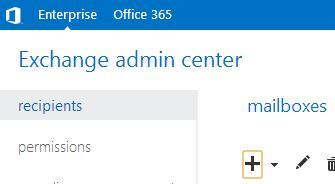
Once logged into the Exchange 2013 Admin Center, verify that Enterprise is selected and that recipients > mailbox is in focus. From here, click on the + (New) button in the action bar to begin setting up the kbox mailbox.
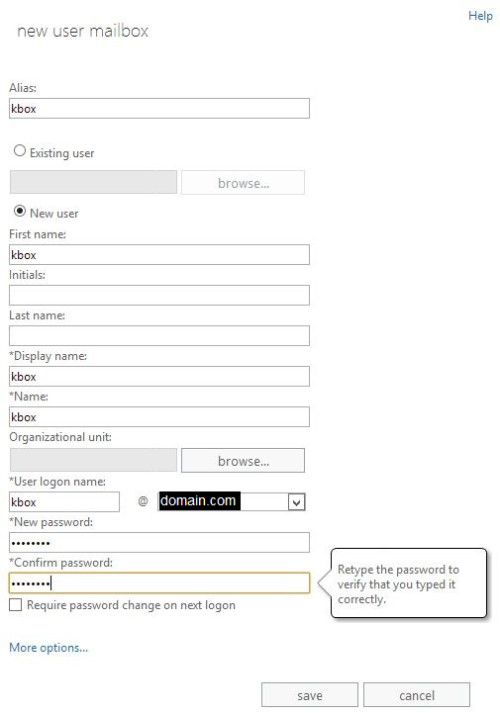
In the new user mailbox screen that appears, populate the fields with the appropriate mailbox name specified in the K1000 Queue Configuration screen. The example below uses “kbox” for the account (user and mailbox names), so be sure to adjust this for your own environment as necessary.
| First name: | kbox |
| Alias: | kbox |
| *First name: | kbox |
| *Display Name: | kbox |
| *Name: | kbox |
| *User logon name: | kbox @ domain.com |
| *New password: | <password> |
| *Confirm password: | <password> |
Once the fields have been populated, complete the setup by clicking on the save button at the bottom of the screen.
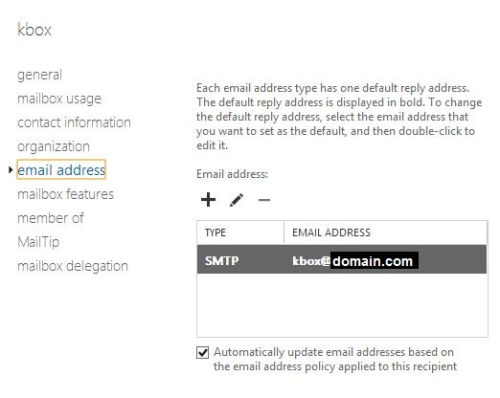
Once the account has been created, an email address based on the applicable email address policy will be automatically generated (by default, based upon the User logon name from the previous step). To verify this, select the account and then select the email address item for the account. The email address listed should be the same as the K1000 Alt. Email Address specified earlier.
4) Create an Exchange contact for the specified K1000 Email Address
The next step is to create a contact in Exchange 2013 that will be used to facilitate email flow to the K1000. It is pretty much the same idea as creating a new mailbox, but without an associated user account in the Exchange 2013 domain.
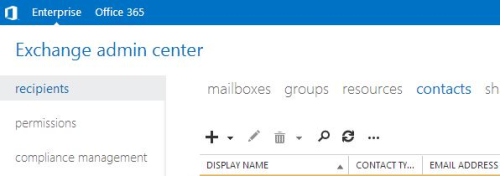
First, navigate to recipients > contacts, and then click on the + (New) button to begin the process.
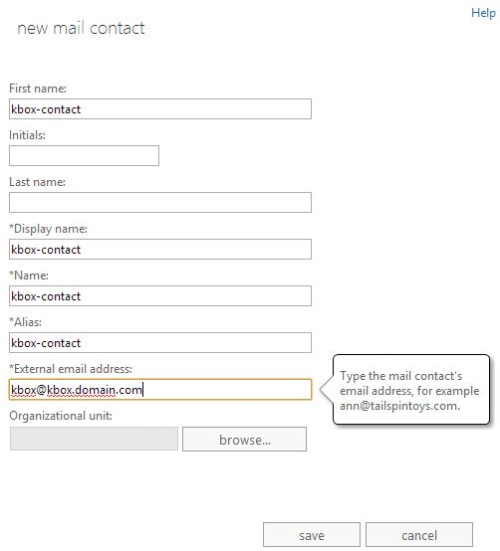
Then, in the new mail contact screen, populate the fields as follows. The example below will use “kbox-contact” as the name, etc for the contact itself and kbox@kbox.domain.com as the External email address (which corresponds with the K1000 Email Address configured earlier). Again, be sure to adjust these as necessary for your own environment.
| First name: | kbox-contact |
| *Display Name: | kbox-contact |
| *Name: | kbox-contact |
| *Alias: | kbox-contact |
| *External email address: | kbox@kbox.domain.com |
Once the fields have been populated, complete the setup by clicking on the save button at the bottom of the screen.
5) Create an Exchange rule to redirect all messages from the K1000 mailbox to the K1000 contact
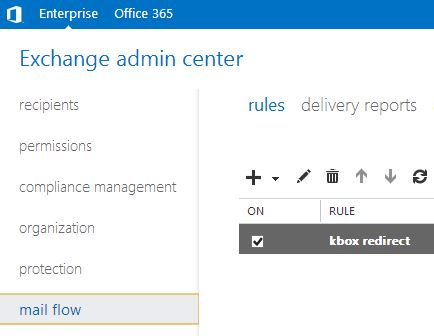
Getting all messages to flow from the kbox mailbox (addressable by domain.com users) to the kbox-contact contact is the goal of the next step. This is accomplished by way of a rule, which is configured in the mail flow > rules section.
To create a new rule, click on the + (New) button.
Continue by specifying the following conditions, adjusting recipients to match your own environment:
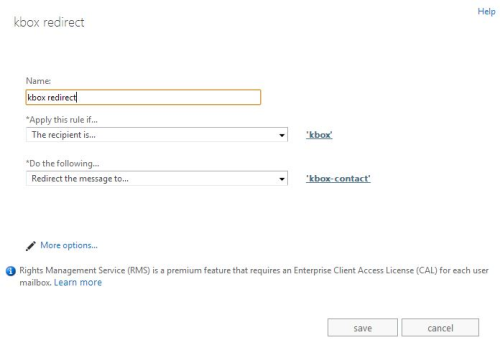
| Name: | kbox redirect | |
| *Apply this rule if... | The recipient is... |
'kbox' |
| *Do the following... | Redirect the message to... | 'kbox-contact' |
When finished, click on the save button to create the rule.
6) Create a send connector to route Exchange contact email to the K1000
The last part of getting email delivered to the K1000 is to create the send connector which will take messages ultimately destined for the kbox@kbox.domain.com contact and send them on to the K1000. One thing to note is that if multiple K1000 queues are employed, only one send connector is necessary – additional mailbox/contact/rule sets will use the send connector configured here to route messages, as long as the contact’s email address specifies kbox.domain.com.
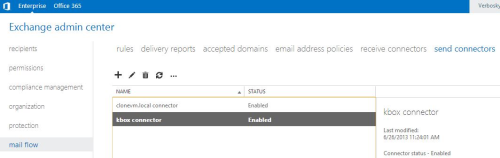
To create a send connect in Exchange 2013, navigate to mail flow > send connectors and click on the + (New) button.
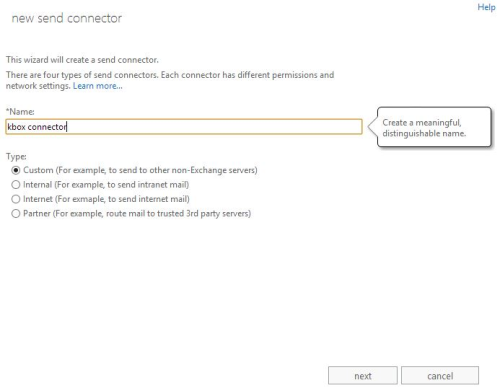
In the subsequent new send connector screen, specify a *Name for the send connector (in this example, “kbox connector”) and the Type (Custom), then click on the next button.
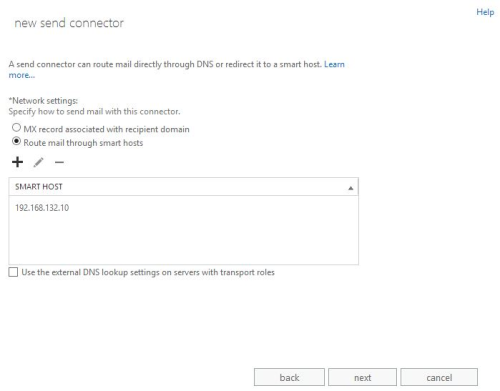
On the *Network settings screen, select the Route mail through smart hosts option, then click on the + (New) button above the SMART HOST section to specify the IP address of the K1000 (192.168.132.10 in the example below). Once completed, click the next button.
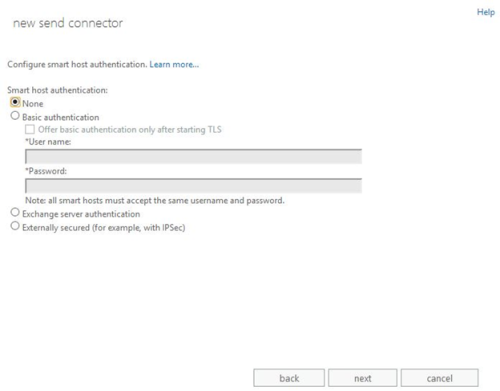
On the following screen, specify None for Smart host authentication, then click next.
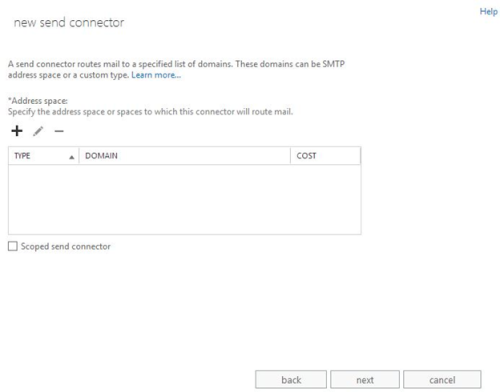
For the *Address space section, click on the + (New) button to specify the K1000’s email subdomain.
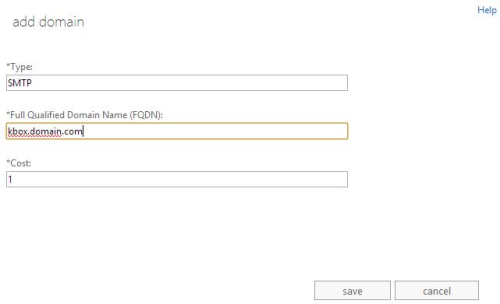
In the add domain screen, complete the fields as follows (being sure to replace “domain.com” with your own domain name) and then click save:
| *Type: |
SMTP |
| *Full Qualified Domain Name (FQDN): | kbox.domain.com |
| *Cost: | 1 |
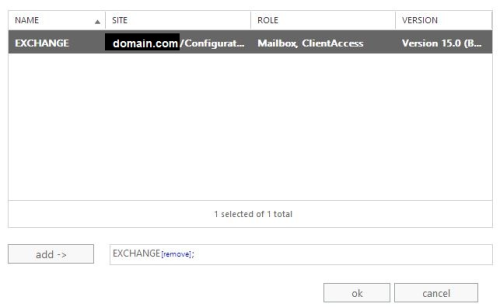
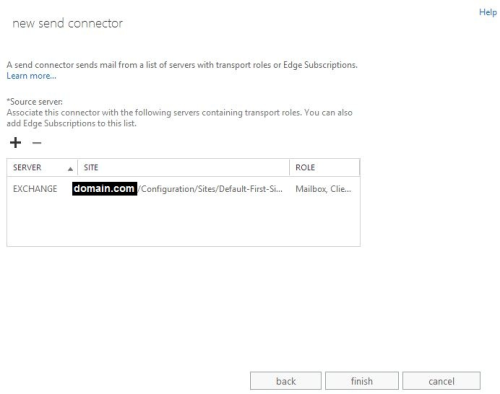
The next step is to specify the Exchange 2013 server as the source server, as in “the source for messages which need sent onto the K1000”. First, click on the + (New) button.
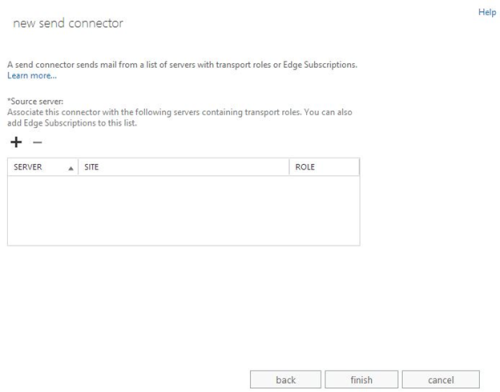
In the following screen, select the Exchange 2013 server, click the Add button to include the server and then click the OK button to specify the server as the source server.
If you have multiple servers which may fulfill this role (as in a clustered environment), be sure to include them here so that messages will be sent to K1000 regardless of which server is processing them.
To finish setting up the send connector, click on the Finish button. At this point, email flow to the K1000 should be working. To get emails from the K1000 to reach the Exchange 2013 users, continue on to the next step.
7) Create a receive connector so messages from the K1000 will be delivered
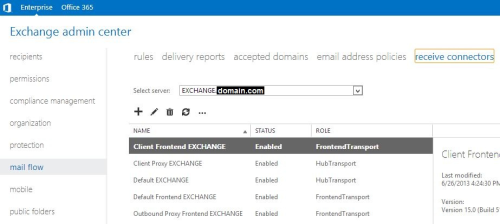
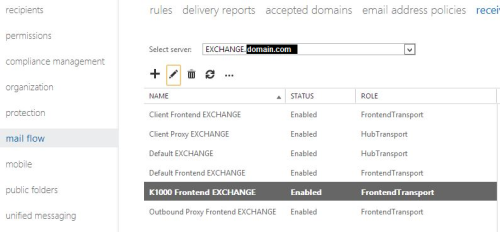
In order to get messages from the K1000 delivered to users within the Exchange 2013 domain, a scoped receive connector needs to be created. To begin with, navigate to mail flow > receive connectors, and then click the + (New) button.
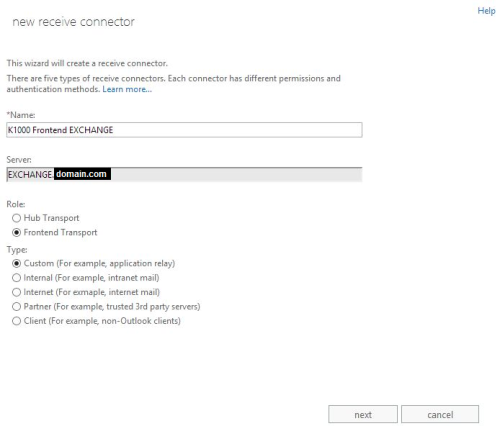
In the subsequent new receive connector screen, complete the fields as follows and then click next:
| *Name: | K1000 Frontend <your Exchange 2013 server name here> |
| *Role: | Frontend Transport |
| *Type: | Custom (For example, application relay) |
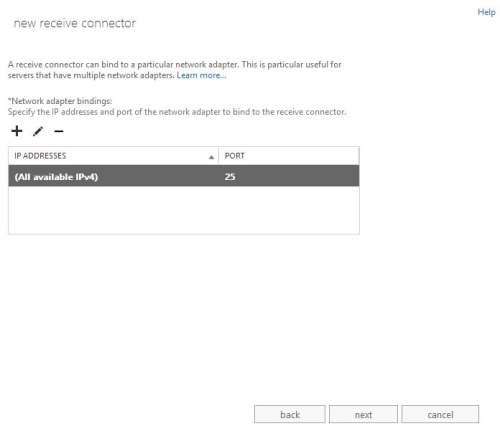
On the *Network adapter bindings screen, verify the following and then click next.
| IP ADDRESSES | (All available IPv4) |
| PORT | 25 |
The *Remote network settings screen is where the receive connector will be scoped to only accept email from the K1000. To make this adjustment, click the pencil (Edit) button.
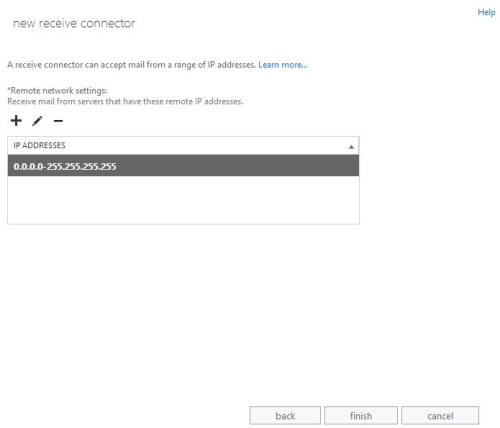
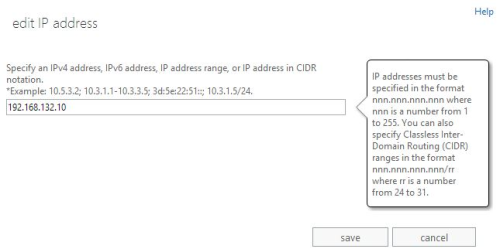
In the subsequent edit IP address screen, enter the IP address of the K1000 (192.168.132.10 in the example below). Once completed, click the save button.
Now that all configuration settings have been specified, click the finish button to create the receive connector.

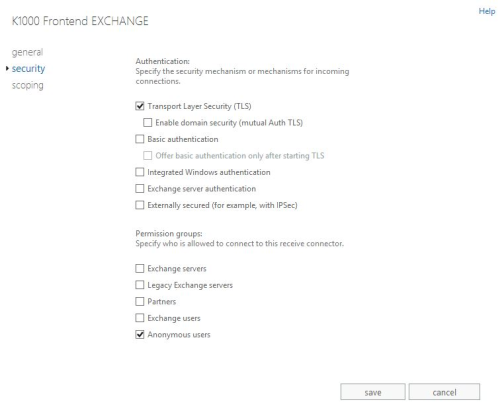
Now that the scoped receive connector has been created, all that remains is to tweak its permissions. To do this, select the K1000 Frontend <your Exchange 2013 server name here> object and then click the pencil (Edit) button to go into the object’s properties.
Finally, select security from the item’s menu, enable the Anonymous users option under the Permission groups section and click the save button to apply. This option will allow K1000 email to reach the Exchange 2013 server without authentication (which is currently not an option for version 5.4, but will be an option in 5.5).
Congratulations – emails from the K1000 will now reach users within your company (assuming they have email addresses defined on the K1000, of course).
Note that while it is possible to enable the Anonymous users option for the Default Frontend connector to enable mail flow from the K1000, this is not recommended as it allows any connection to anonymously utilize the receive connector and creates a security risk.
8) Test email flow to the K1000
In order to test email flow from the Exchange 2013 server to K1000, a test message from the Exchange 2013 server may be sent from the command line using telnet. Since Exchange 2013 is commonly paired with Server 2012 (which by default doesn’t include a telnet client), the following can be done to remedy that situation:
Installing a telnet client in Server 2012
- Run Windows PowerShell as Administrator
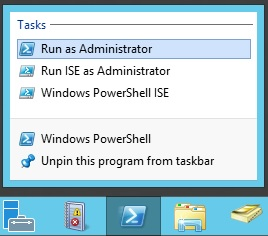
- Run the following command:
install-windowsfeature "telnet-client"
Now that the telnet client is installed, open a command prompt on the Exchange 2013 server. Also, be sure when you do this test that the address used (submitter@domain.com) is a valid user that can submit tickets to the helpdesk queue you are testing (which also allows you to test receiving the reply message the K1000 generates, if the New Ticket Via Email event is enabled in the K1000 queue configuration).
telnet
set localecho
o kbox.domain.com 25
EHLO domain.com
MAIL FROM:<submitter@domain.com>
RCPT TO:<kbox@kbox.domain.com>
DATA
<Note that if you make any typos at this point, you will have to start over - so type carefully.>
To: <kbox@kbox.domain.com>
From: <submitter@domain.com>
Subject: <Test>
Test
.
quit
quit
Assuming that there are no configuration issues (i.e. typos, firewall), there should now be a new ticket in the target Service Desk queue.
Note that on some K1000 configurations there must be a user with the email address of admin@domain.com that is allowed to be a submitter of tickets.
9) Hide an Exchange 2013 contact from the Global Address List (GAL)
The configuration outlined earlier works, but having a “utility contact” listed in everyone’s address book may not be desirable. In Exchange 2013, the following process can be used to mark the contact as hidden.
Exchange 2013 machine
- Run the Exchange Management Shell as Administrator

- Run the following command, replacing <alias> with the contact's alias:
Set-MailContact <alias> -HiddenFromAddressListsEnabled $True
For example:
Set-MailContact kbox-contact -HiddenFromAddressListsEnabled$True
Client machine with Outlook 2013
- Outlook 2013 > SEND/RECEIVE tab > Send/Receive Groups > Download Address Book...
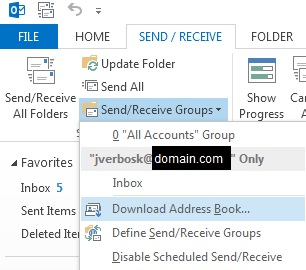
- Open the Address Book and verify that the contact is now hidden

Comments