
I. Creating the Office 2010 MSP file for silent installation
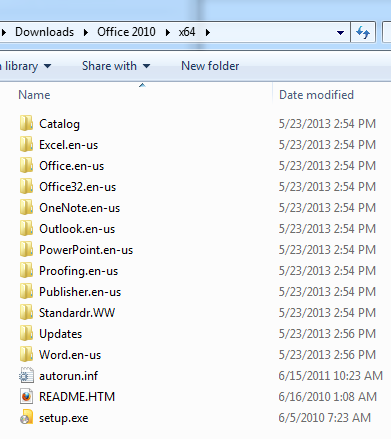
- Insert the Office 2010 DVD into a system to build the MSP file on
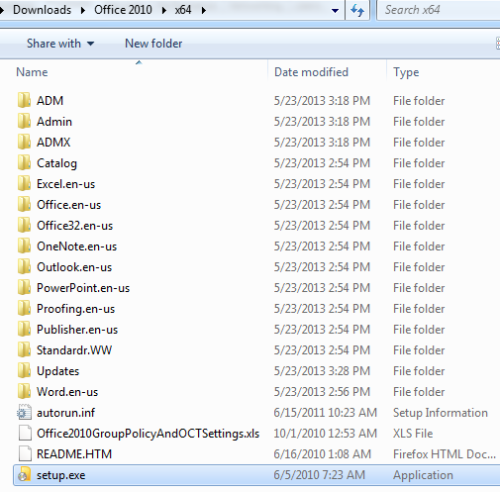
- Copy the installation files to the desired directory on the build system
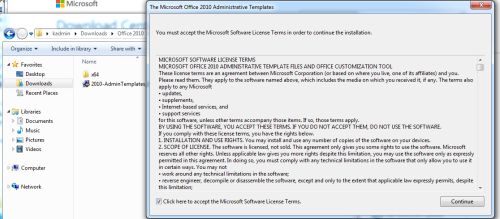
- Download the Office 2010 Admin Template files: http://www.microsoft.com/en-us/download/details.aspx?id=18968
- Launch the Appropriate admin template file for the version you are installing
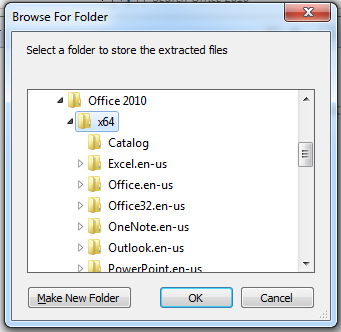
- Extract the Office 2010 Admin files to the folder where the Office files are located
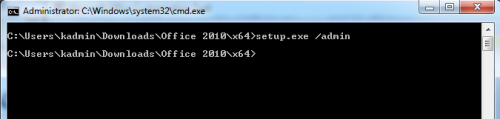
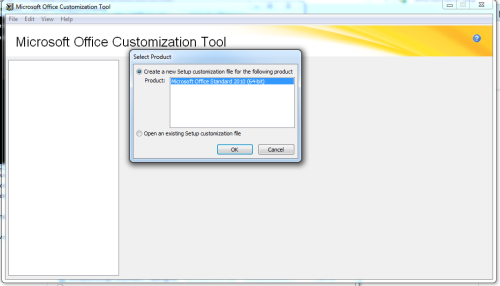
- Initiate the Office Customization tool with the command below
- Select the desired version you are going to install
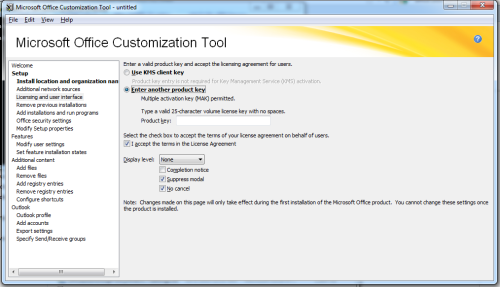
- Configure the Office install in the manner for which you would like it installed
- On the Licensing and user interface section, make sure to select the option to accept the terms in the License Agreement and change the display level to basic or none. The full display level will allow the end user to view/alter the install
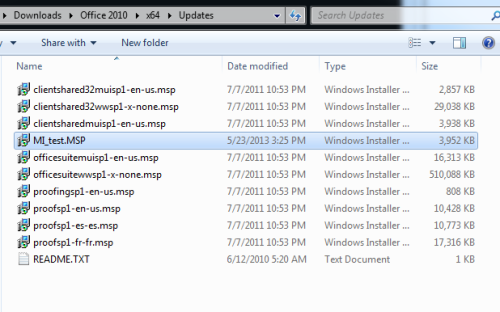
- After the configuration has been completed and the MSP file has been saved, copy the MSP file to the Office Installation Updates folder
- Like any deployment, you want to test your install before try to deploy it
- Run setup.exe – Since we put the MSP in the updates folder, we don’t have to call it when we launch setup.exe and it will automatically be called
 NOTE: You will notice that even if you chose the None option for the display level, a momentary office install window will still appear. This window is not able to be suppressed and any complaints regarding this needs to be directed to Microsoft as KACE has no control over it.
 - When the install has been configured successfully, the files can be zipped up. For simplicity sake, use the following process for zipping the files:
- Navigate to the root of the install files since this will be the directory where the setup.exe file is located
- Select all files
- Right click and send to compressed/zip file
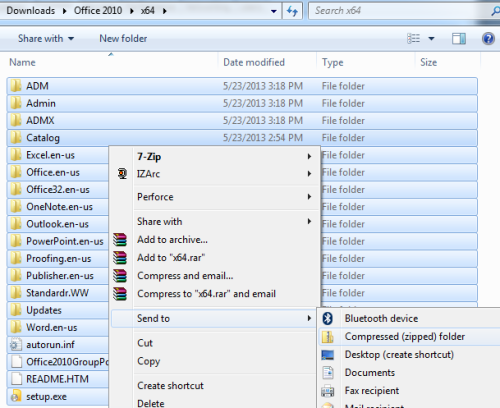
- A new zip file will appear and can be named as desired

- If this is the first system to have Office 2010 installed on it, you will want to force an inventory from the K1 so a record will be generated in the Software Inventory
- If this is the same system that is going to test the deployment from the K1, uninstall the office installation at this time
- Navigate to the root of the install files since this will be the directory where the setup.exe file is located
- Run setup.exe – Since we put the MSP in the updates folder, we don’t have to call it when we launch setup.exe and it will automatically be called
II. Building the Managed Install on the K1000
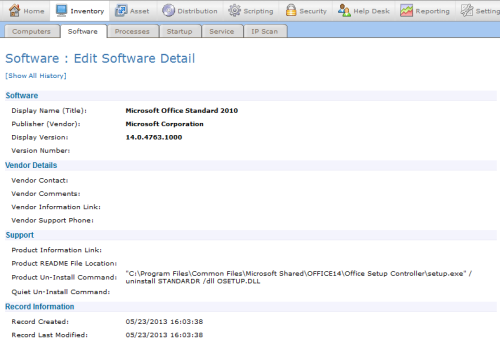
- Locate the listing for Office 2010 in your Software inventory (Inventory>Software Tab – I searched for 2010 and that greatly narrowed my results)

- Click the Software title to access the Software detail page
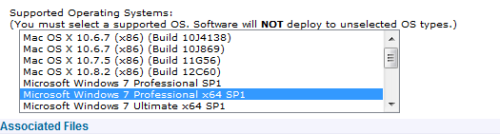
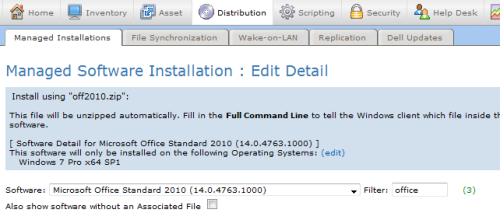
- Select the Operating systems that are going to receive the Office install
- Locate and click the Browse button under the Associated Files section to upload the Desired zip file
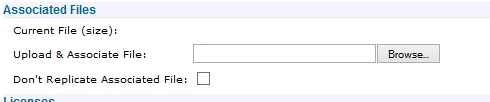
- Navigate the File Upload selection window to the location where the Office 2010 zip file is located at
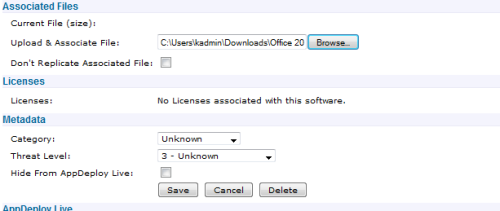
- Click Save to upload the file and due to the size of the zip file, this will take a few minutes

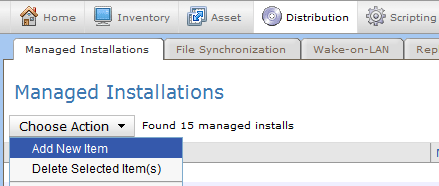
- Click the Distribution category. Using the Choose Action drop-down menu and select the option to Add New Item
- On the Managed Software Installation Edit Detail page, select Office 2010 from the Software drop-down menu
- Since we are having to use a zip file to perform this install, Select to Configure Manually
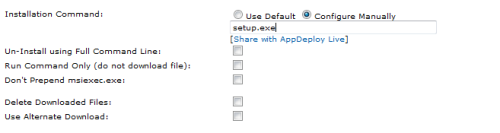
- Since we put our MSP file in the Updates folder of our Office Build, all we need to do is call Setup.exe and our MSP will be called during the install without any special switches.
NOTE: At least during testing, I advise to not check the Delete Downloaded Files option in case the files are needed on the test system for troubleshooting the deployment. As soon as the MI is functioning as desired, this option can be used to keep from consuming too much disk space with large installs.
- Select the test system that will be used for testing
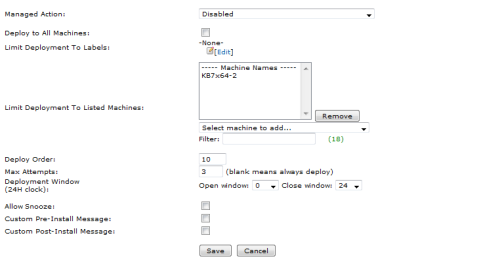
- Set the desired Deployment order, Max attempts, Deployment Window, and set any Pre/Post install message options and click Save
- On the Managed Software Installation Edit Detail page, select Office 2010 from the Software drop-down menu
- Click into the new Managed Install and confirm that settings are set as desired. If all is well, change the Managed Action to Execute anytime (next available) and click Save

III. Testing The New Managed Install
- Enable debug on the test computer using the following article: How to enable Debug
- Force an Inventory update on the test computer from Inventory>Computers Tab
- Monitor the test computer for installation. Watching Task Manager is helpful to see when a fully silent install completes. The Process that needs to be watched will be named Microsoft Setup Bootstrapper. Watching the C:\ProgramData\Dell\KACE\Downloads folder can also be helpful so that the end user can see the Folder created with the Software Item ID number and to see if the zip file was copied over. Once the download has completed and the agent has validated the HASH, the install files will be extracted to the directory
- If the install doesn’t proceed, review the agent logs for any failure message(s) and correct the failure(s). If the end user isn’t able to determine where the failure is from reading the logs, manually execute the install from command prompt using psexec.exe –s to test the install in a similar means as the agent will run it.

Andy - andrew.sherlock 8 years ago