
Introduction
The purpose of this document is to describe best practices in the creation and deployment of Microsoft Windows System Images with the Quest KACE SDA. This document applies to SDA deployments version 7.0 and higher.
Overview
When Windows images are created, one of the roadblocks we have to deal with is the move towards the UEFI architecture. This introduces a level of complexity into creating images that can function in the legacy BIOS mode as well as the new UEFI standard. Administrators must understand partitioning and how all of the partitions relate to image capture and deployment within the KACE SDA. With a good understanding of partitions and the architectures, we can limit the number of images that need to be created and still provide full functionality with legacy and UEFI architecture.
Pre-Requisites
This document makes the following assumptions:
· Functional KACE SDA version 7.0 or higher
· Volume license copy of Windows to use for image creation (We will focus on Windows 10 for the purposes of this document)
· Virtual Machine available with sufficient disk space (must have over 50% free space left when image is ready to capture)
· Machines to test image deployment
![]() NOTE : With the first release of Windows 10 Build 1809 (October
2018) and the accompanying ADK/Windows PE add-on, marks the first ADK that does
not includes PE add-ons, make sure both the ADK and PE-Add-ons are installed.
We will be using ADK 10 Build 1903.
NOTE : With the first release of Windows 10 Build 1809 (October
2018) and the accompanying ADK/Windows PE add-on, marks the first ADK that does
not includes PE add-ons, make sure both the ADK and PE-Add-ons are installed.
We will be using ADK 10 Build 1903.
Creation of KACE Boot Environments (KBEs) are necessary to provide a bootable environment from which an image can be deployed. This is done using the KACE Media Manager tool provided through the SDA interface. Always download and install the latest version of the Media Manager before creating KBEs. Media manager will be updated on almost every release of the KACE SDA Appliance. The Media Manager Utility must be installed on the same computer on which the Windows ADK is installed.
When creating KBEs, the Media Manager tool will extract Windows PE from the locally installed ADK, and it will inject the drivers in the KACE SDA Drivers kbe_windows_xNN (where NN is 86 or 64).
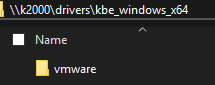
KBE Drivers
Create the KBE giving it an appropriate name (like architecture, version of PE, date built, etc.). for more advanced usage, administrators may want to add PowerShell and/or .Net packages to the KBE but for most purposes these are not needed.

KBE Creation
Once the KBE is created, it will appear in the KACE SDA console in the Boot Environments and the Source Media areas.
DHCP Setup and Booting to KBEs
In order to force machines that are booted to the network to contact the KACE SDA, there are options in DHCP that must be set. Refer to setting up these options in the KACE SDA admin guide or the following articles on the KACE Knowledge Base:
Microsoft DHCP: https://support.quest.com/kace-systems-deployment-appliance/kb/217556
Non-Microsoft DHCP: https://support.quest.com/kace-systems-deployment-appliance/kb/112037
Once you have setup DHCP, then you can PXE boot client machines (physical or virtual) to test the KBE loading. If all goes correctly, you will see a boot menu with imaging options.
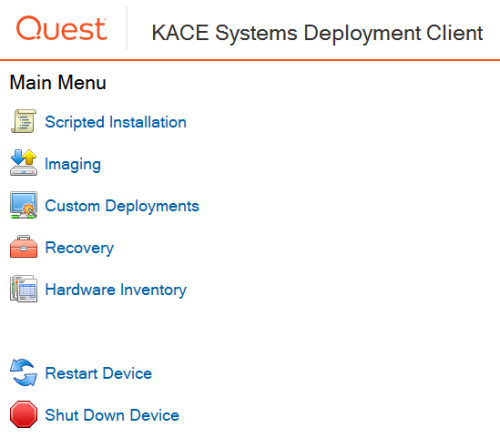
KACE KBE Boot Menu
Now that we have a bootable KBE, the next step is to focus on building and capturing the System Image that will be used for deployment.
Image Creation
When creating your image in the SDA we suggest that we keep the image simple by using only a single partition, and then add partitions if needed during the deployment. The first step in creating a master image will be to use the KACE SDA to deploy Windows 10 to a VM. Using a VM we can easily take periodic snapshots that can be used to revert to previous states as we test and refine our images.
Scripted Installation
Using KACE Media Manager, upload the Windows media to the SDA Appliance. Mount the Windows ISO file as a drive letter on your administrator machine and upload the media to the SDA.
Note that you cannot upload the ISO directly to the SDA, it MUST be mounted so Media Manger can read and upload the files within the ISO. You can also copy the contents of the ISO file to a directory on your hard drive and point the Media Manager to the directory with the extracted files.

Media Manager Upload
Once the media has been uploaded, the next step is to build a Scripted Installation in the KACE SDA to deploy Windows. Follow the Scripted installation wizard and answer the installation questions. When you get to the image deployment detail page, create a basic installation with a single partition. Using a single partition will allow administrators to create a system image that will function in Legacy (BIOS) mode or UEFI mode. UEFI mode will require a second boot partition that can be added to the System image deployment.

Pre-Installation Task for single partition image
You may choose to add any Mid-Level or Post-Installation tasks that you need, remembering that anything you add in the scripted installation will be part of your master image.
Next, we need to prepare the VM and deploy the image. Create a VM that is set in Legacy (BIOS) mode with 4GB of RAM and enough disk space for the image and applications you plan to install. Make sure you allow for some spare space on the disk so that you can add patches and applications later if needed.
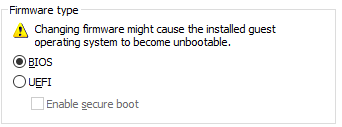
BIOS Mode in VMWare Workstation
Deploy the Scripted Installation to the VM and once finished you should have a single partition image on the VM. Verify this by looking at Disk Management in the newly deployed VM.

Verify Single Partition Image
Updating the Image
Now that you have a working Windows 10 installation, it is time to run updates. Patch the system as much as possible. Put on any applications that are needed in the base image. There is not any “perfect” method here, every organization is different. There are apps that you may want in the image (more complex, large installs), and apps that you might want to deploy using Post Install tasks (easy to deploy via command line, updates frequently).
Organizations may also want to consider removing
bloatware that comes with Windows installations before running sysprep. There are many tools and scripts out there to
help with cleanup of a Windows image.
Preparing the Image for Capture
Once you have finalized the image, it is advisable to take a snapshot of the image in your Virtual Hypervisor. Shut down the machine and create the snapshot so that when it is time to update the image, you can revert to this clean state.
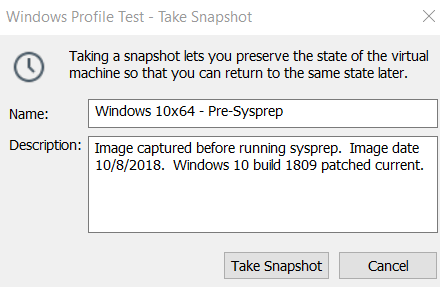
Creation of VM Snapshot (VMWare Workstation)
Creating Sysprep Answer File
When your snapshot has completed, boot into the VM and login to the local administrator account. Quest provides a simple to use tool that will create and run the sysprep commands on your Windows image so that it can be captured by the SDA. This tool is located under Library Overview, Sysprep Unattend Files.

KACE SDA Deployment Workbench – Sysprep Creator Wizard
The Sysprep Creator Wizard guides you through the steps to create an answer file for Sysprepping an image.
On the left navigation pane, click Library to expand the section, then click Sysprep Unattend
1.Files to display the Sysprep Unattend Files page.
2.Select Choose Action > Sysprep Creator Wizard.
Note: You can also start the wizard by clicking the link on the Library Overview page.
3. Complete the wizard and then select save.
4. Download the Unattend File with Sysprep Executor
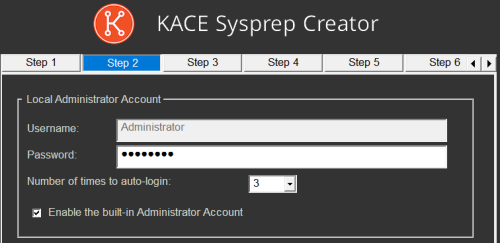
Auto Login Parameter in Sysprep Creator Wizard
When completed, save the files on the target machine. As long as the two files are in the same directory, you can run the executor and it will use the unattend file created.
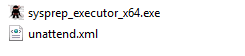
Sysprep Creator Files
Launch the executor file and it will perform a pre-requisite check on the system to see if there are things that may prevent sysprep from completing successfully. If there are any issues, allow the tool to fix the issues or you can manually fix the issues. Once all the checks are successful, you can run sysprep and select the Sysprep Now, and use the shutdown option.
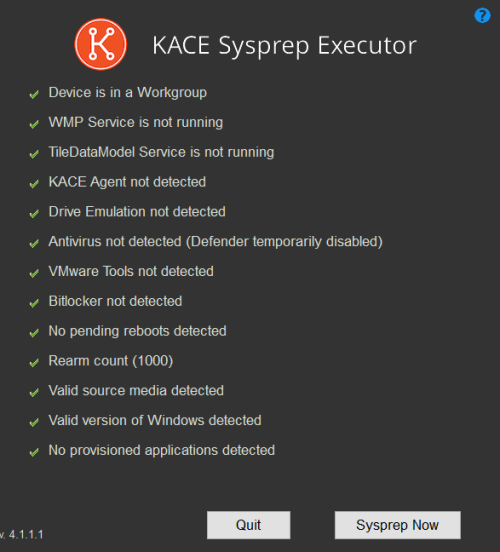
Successful Sysprep Check
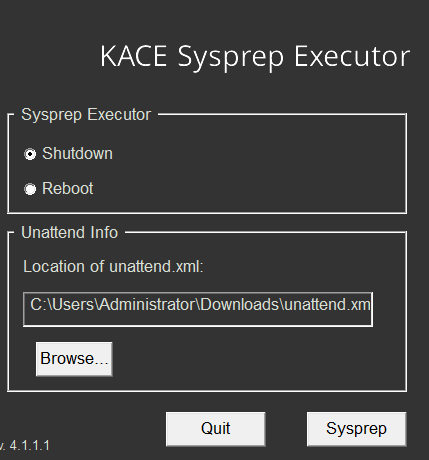
Sysprep Creator - Shutdown Option
When sysprep completes, the system is ready to be captured to the SDA.
Capturing the Image
Boot the Imaging VM to the SDA and select the Capture Image option, selecting the C: drive and naming the image. Best practice is to capture WIM images as they can be used for multicast deployment and are typically faster to deploy.

Capturing Windows System Image from Single Partition
Setting up Image Deployment
When the image is captured the Installation Plan of the image will be blank. In order to deploy the image we must create partitions for deployment and add naming tasks and post-installation tasks to the deployment as needed. Because the image was created from a single partition image, we can deploy this to a Legacy system or UEFI system when using the appropriate partitioning tasks.
The following ITNinja article describes the use of a combination task that will prepare the disk appropriately based on the architecture of the system that is receiving the image.
https://www.itninja.com/blog/view/bios-uefi-combined-tasks
We will be using two different tasks for the image deployment for partitioning. This will allow the single image to be installed on either Legacy or UEFI architectures. Initially we will consider the simplest configurations for each architecture. Legacy systems will have a single partition, while UEFI systems will have three partitions used for UEFI architecture.
The following tasks for creating BIOS and UEFI partitions are INCLUDED in the KACE SDA version 6.1 upgrade. You should only have to create these tasks if you are currently running a KACE SDA version 6.0.
- While administrators can name tasks any way they need, in the examples below the tasks are named as follows:
o The Pre-Install task - [DISK] Create BIOS/UEFI Partitions
o The Mid-Level task - [DISK] Apply BIOS/UEFI Partitions
Example of Image Deployment using Partitioning Tasks

This single installation of the System Image will apply the appropriate partitions regardless of the architecture of the system.
|
|
When using physical machines, or even with virtual machines, there may be times where a DVD drive is connected, or a USB storage device (especially if you are using a USB device to boot the KACE Boot Environment). In these cases, you have to look at the partitions and drive letters that are assigned when the boot environment loads. You may need to alter some of the partitioning scripts to take those drives and drive letters into account.
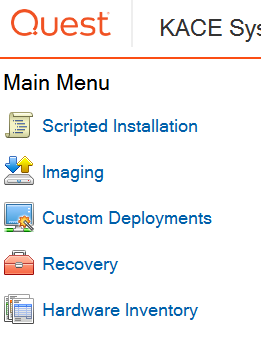
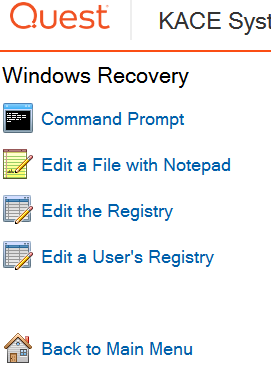
To view a particular machine’s disk configuration, boot your device into a KBE and open a command prompt from the Recovery Menu.
|
Recovery Menu |
Command Prompt |
Using DISKPART commands, we can see the disks and the drive letters being used on the system. If you see that there are drive letters that you need to use during your image deployment (i.e. Drive D is used for a Windows Boot partition or Data storage) then we will have to reassign the drive letters before we can do an image deployment to this machine. Below is an example of a machine with a USB storage device and DVD drive attached.
To view all of the disks in the system, using diskpart, you would type LIST DISK. To view the drive letters, use the command LIST VOL.
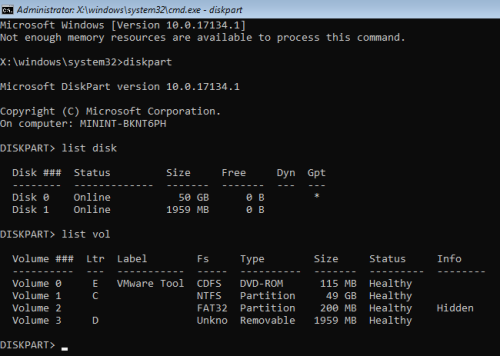
Machine with multiple drives
In the above configuration, notice that the C, D, and E drive letters are taken by DVD and USB drives. If we tried to build this machine with a C partition for Windows and D partition for data storage it would fail because the drive letter is already assigned.
To accommodate this, we can alter the partitioning scripts to reassign the drive letters. The easiest way to do this is by selecting the volume(s) that you want to use and reassigning drive letters that are not in use.
NOTE: The T: and Y: drives are automatically mapped in KBE to directories in the SDA. When you create new drive letter assignments you should avoid using T:, X: , and Y: drive letters.
To alter the above configuration, you can add the following lines to your disk part script BEFORE you do any formatting of the disk.
|
SELECT VOL 0 ASSIGN LETTER J SELECT VOL 3 ASSIGN LETTER K |
If you ran those commands manually in the command line of
the KBE you would see the following:
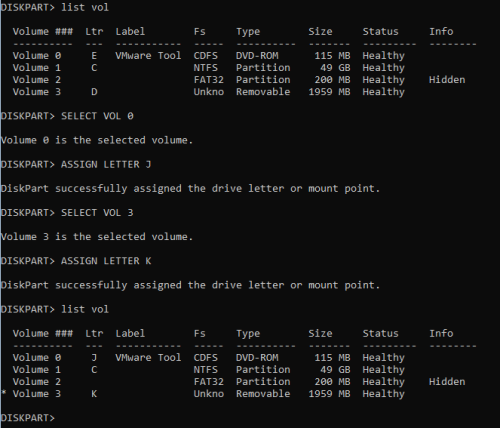
Reassigning Drive Letters with DISKPART commands
Now that the drive letters are reassigned, you could proceed with a multi partition installation and create a D drive if needed.
If we look at how the task would need to be modified in the KACE Pre-Installation script, we would have the following Pre-Installation task that could create C and D partitions on the hard drive in either BIOS or UEFI architectures. The task would reassign the drive letters of the USB and DVD drives so they are free to be used when partitioning and formatting the hard drive in preparation for the image deployment.
Based on your configuration you may have to alter the volumes and drive letters. The drive reassignment commands are highlighted in red in the example below.
Example – Reassigning Drive Letters and Creating a D Partition for Legacy and UEFI systems|
@echo off wpeutil UpdateBootInfo for /f "tokens=2* delims= " %%A in ('reg query HKLM\System\CurrentControlSet\Control /v PEFirmwareType') DO SET FIRMWARE=%%B echo Firmware Type: %FIRMWARE% echo Explanation of Firmware Type: (0x1 is BIOS, 0x2 is UEFI) if %FIRMWARE%==0x1 goto BIOS if %FIRMWARE%==0x2 goto UEFI goto END
:UEFI ECHO SELECT VOL 0 ECHO ASSIGN LETTER J ECHO SELECT VOL 3 ECHO ASSIGN LETTER K ECHO select disk 0 ECHO clean ECHO convert gpt noerr ECHO create partition efi size=200 ECHO assign letter=s ECHO format quick fs=FAT32 ECHO Create partition msr size=128 ECHO Create partition primary size=3000 ECHO assign letter=D ECHO format quick fs=NTFS label="Data" ECHO create partition primary ECHO assign letter=c ECHO format quick fs=NTFS label="Windows" ECHO exit )>X:\Windows\System32\UEFI.txt diskpart /s X:\Windows\System32\UEFI.txt goto END
:BIOS ( ECHO SELECT VOL 0 ECHO ASSIGN LETTER J ECHO SELECT VOL 3 ECHO ASSIGN LETTER K ECHO select disk 0 ECHO clean ECHO create partition primary size=3000 ECHO assign letter=D ECHO format quick fs=NTFS label="Data" ECHO create partition primary ECHO assign letter=c ECHO active ECHO format quick fs=NTFS label="Windows" ECHO exit )>X:\Windows\System32\BIOS.txt diskpart /s X:\Windows\System32\BIOS.txt goto END
:END Conclusion This guide provides the basic steps needed to create an image and deploy it successfully with the KACE SDA. While there can be any number of partitioning combinations and drives used on Windows devices, this guide should give you a basic understanding on how you can create a single partition Windows image, and deploy it to Legacy BIOS architectures as well as UEFI architectures, while accommodating various partitioning schemes that may be needed in a production environment. |

Comments