
I wanted to post a quick tutorial for how we use the Sysprep
Creator tool.
Please be sure to select "How useful this was to you" at the top of the page.
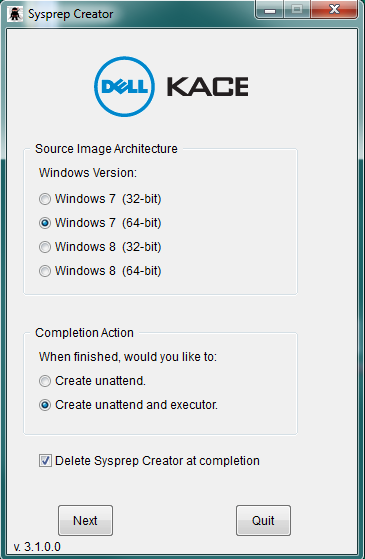
Launch Sysprep_Creator_x64.exe
Choose your version of Windows (We are not running the newest version)
Under Completion Action - choose your option.
The executor is what launches the sysprep process and points to the unattend.xmlIf you are running sysprep_Creator on the machine you are sysprepping, choose the "Delete Sysprep Creator at completion"
Click "Next"
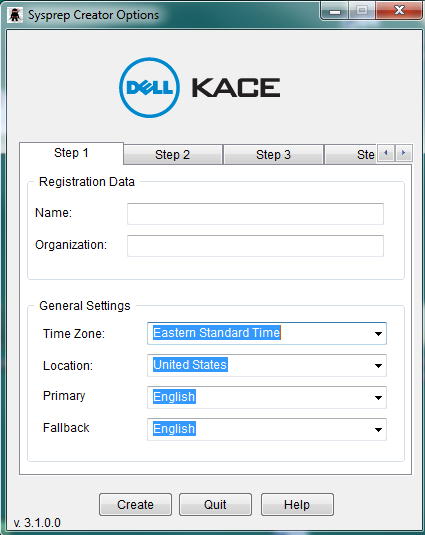
Step 1
Type in a name (we use a . In this field
Type in your organization name
Choose your time Zone
Click on the Step 2
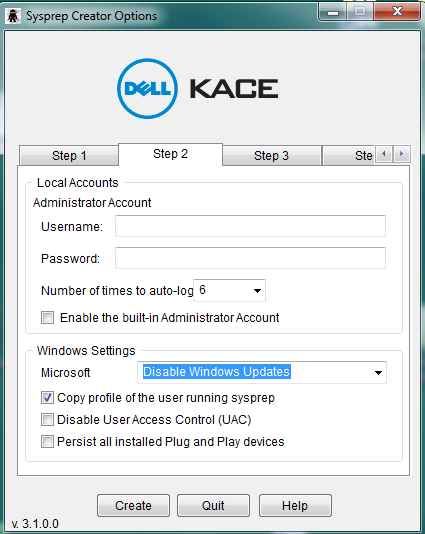
Step 2
Type in the username and password of a local administrator or one that you would like to have created
Choose how many times the computer can/will autologin after necessary reboots
If you are using the current profile on the system you are sysprepping as a template for all future users who login, you will want to be logged in as that account prior to sysprep and choose the "Copy profile of the user running sysprep"
Click Step 3 Tab
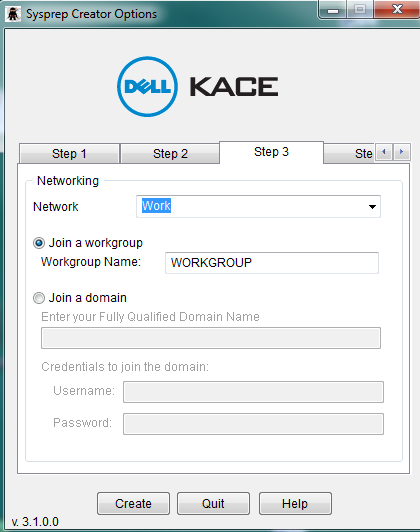
Step 3
- We do not make any changes on this screen since we join the domain as a post install task
- Click Step 4 Tab
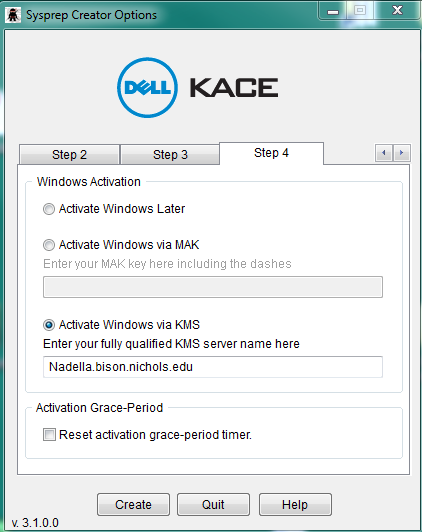
Step 4
We use a KMS server so we want to check off that option and type in the KMS server FQDN
"Reset activation grace-period time" If your image is older and the timer only has a few days left, it can't hurt to check off this box
Click Create and choose the location you want to save the file(s)
We save theses in two places. A local network share and also place them inside the Samba Share of the K2000 under Drivers_postinstall\sysprep files so we can easily get to it from any machine.
Sysprep execution
Login to the account you configured the default profile you want all users to use.
Copy the Unattend.xml to c:\Windows\System32\sysprep
Copy the sysprep_executor_x64.exe to the desktop
Double click on the executor file on your desktop.
Accept the UAC prompt
Choose Shutdown - You don't want it to reboot before you capture the image
Click browse and navigate to c:\windows\system32\sysprep\unattend.xml
Choose Open
When you are ready, click "Start Sysprep" and let it finish. The system will Shutdown once complete
NOTE: I've noticed that I need to copy both files above to the desktop before trying to copy the unattend.sml to the sysprep directory.
If you have any questions, feel free to let me know. If you have any additional input for me to add (or if I am completely wrong) I'd be happy to edit this post

http://www.itninja.com/blog/view/sysprep-creator-wizard - SMal.tmcc 7 years ago