
Introduction
In this document we will explore how to utilize the KACE Sysprep Creator Utility and validate the unattend.XML file with Windows System Image Manager. The KACE Sysprep Creator Utility can be downloaded from here:
KACE Sysprep Creator – ITNinja.com
After completing this document, you should be able to create and validate the unattend.xml file generated by the KACE Sysprep Creator tool.
KACE Sysprep Creator
The KACE Sysprep Creator tool allows administrators to create unattend.xml files that are used when running the Microsoft System Preparation Tool (sysprep).
Creating Unattend.xml files with Sysprep Creator
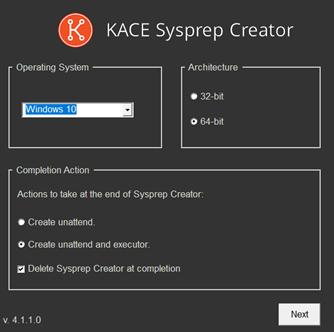
Select the OS and Architecture for the unattend file. The Executor option will create an additional file which will perform sysprep pre-requisite checks and run sysprep if all the checks pass. Either option will generate an unattend.xml file which will provide the installation options for the image deployment.
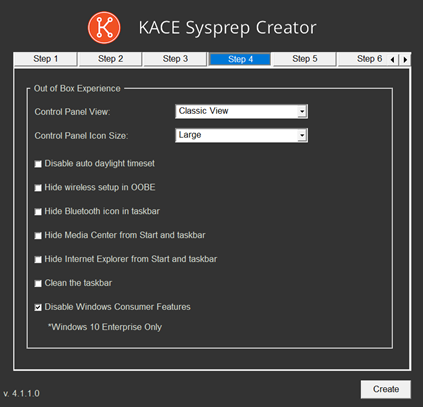
Continue through all 8 steps of the sysprep creator,
answering all necessary parameters. Steps 5,6, and 7 are omitted from this
document as they are rarely used settings.
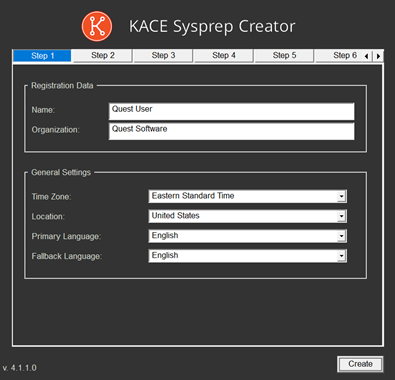
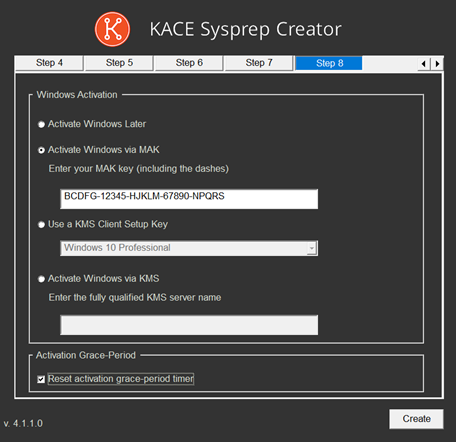
Click Create when finished entering all settings. Save the unattend file (and executor if selected) to your hard drive.
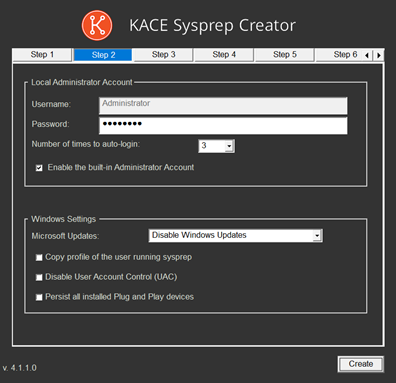
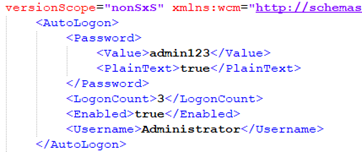
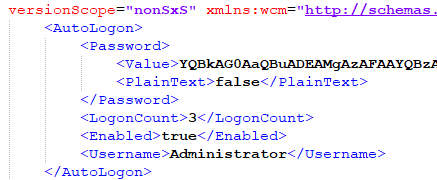
Note that in the unattend.xml file you will see that the local account passwords are in clear text.
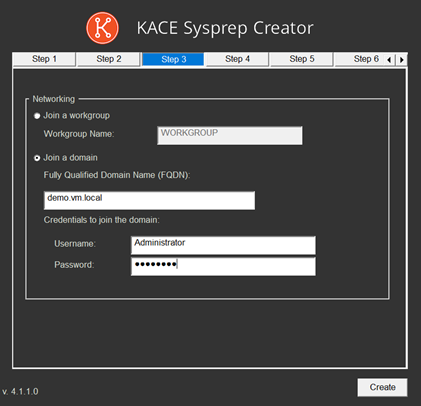
![]() NOTE: Domain join passwords are ALWAYS in clear text and CANNOT
be encrypted. Microsoft advises that accounts for join domain should have ONLY
the permission to add machines to the domain and have access to no other
resources.
NOTE: Domain join passwords are ALWAYS in clear text and CANNOT
be encrypted. Microsoft advises that accounts for join domain should have ONLY
the permission to add machines to the domain and have access to no other
resources.
Using System Image Manager to Validate the XML
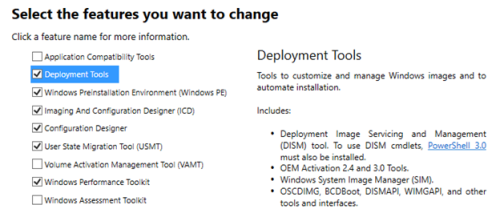
When installing the Windows AIK (Win 7) or the Windows ADK (Windows 8/8.1/10) one of the options is to install the Windows Deployment tools which includes System Image Manager. This tool is typically how an administrator would create the unattend.xml files if they did not have the KACE Sysprep Creator wizard.
Using System Image Manager
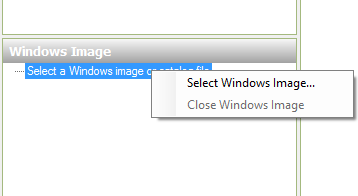
Once you have created the unattend.xml file, the next step is to validate it against the Windows Installation media. The best way to do this is to copy the Windows installation media to a directory on your hard drive. Once you have copied it over, the next step is to add the media to the Windows image section. Right click on Select Windows image catalog file and select Windows image.
Browse to the INSTALL.WIM file in the Windows media under the \\<Windows DVD>\Sources directory…

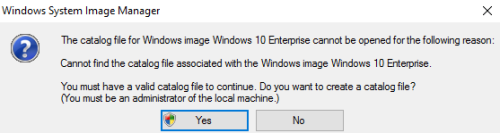
Say yes and let it create a catalog file if asked. This will only happen the first time you open the image. It will create a catalog file in the directory where the install.wim file is located.
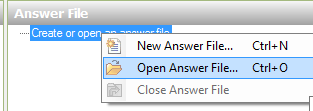
Next, open the answer file and associate the unattend.xml file with the image.
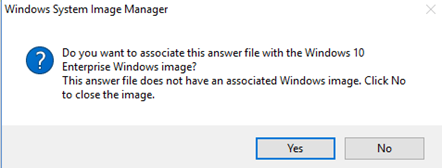
Select Yes to associate the XML file with the image.
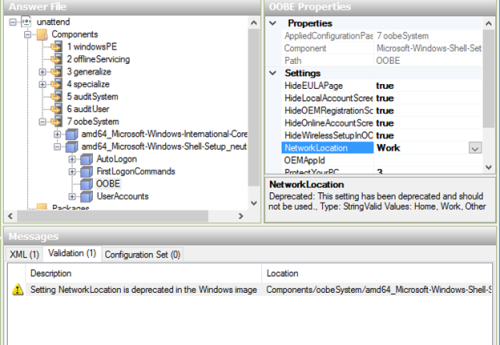
Once the answer file is associated with the file, the Messages pane in the bottom of the screen will show validation errors. Double click on each message to review and change the setting.
|
Note:
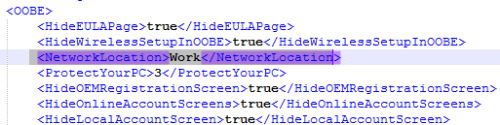
In some cases (as in Network Location in the example), the setting cannot be changed. In this case you can manually edit the XML file and remove the line(s) related to that setting.
|
Finalizing the Unattend.xml file
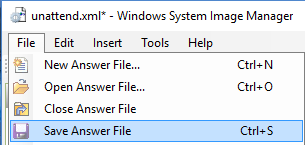
While in System Image Manager, you can add other features and settings as needed. For more advanced users there are many settings that can be added to the unattend.xml file. KACE Sysprep creator only generates the basic requirements to successfully sysprep a system. Once all of the issues have been resolved, and new features/settings have been added, go to the File menu, select Save Answer file:
An added benefit of using Windows System Image manager to validate the unattend.xml file, is that the password stored in the XML file for local administrator account will be encrypted when the new answer file is saved. Remember: passwords for the join domain function will NOT be encrypted.
Using the new XML file
Copy the unattend.xml file to the appropriate location on the system that will be running sysprep. If using just the unattend,xml file and not the KACE Sysprep Executor, copy the unattend.xml file to C:\Windows\System32\sysprep and run sysprep according to Microsoft guidelines.
If using the Sysprep Executor file to run sysprep on the target system, then simply copy the executor file and the new unattend.xml file to the desktop of the system and let the executor run sysprep. It will delete the files so there is no residual files left in the image.

Comments