
From time to time, I will get the question “Does the KACE Service Desk Support Change Management?” More often than not, most customers just need the ability to track any change that occurs and possibly get an approval before they commit the change. Simple Enough.
If that’s the case, the KACE Service Desk can definitely support that type of workflow. In my experience, any customer that is doing this today has accomplished this by creating a specific queue for “Change Requests”. There are many advantages to doing it this way; for instance, a custom form can be created, I can restrict who can submit change requests as well as who approves change requests, the default email templates can be customized to be more “change” friendly, reports can be change specific, and lastly, ticket rules can differ for change requests.
If you don’t have the time or energy to devote to building this out yourself, I will do my best to get you started in the right direction.
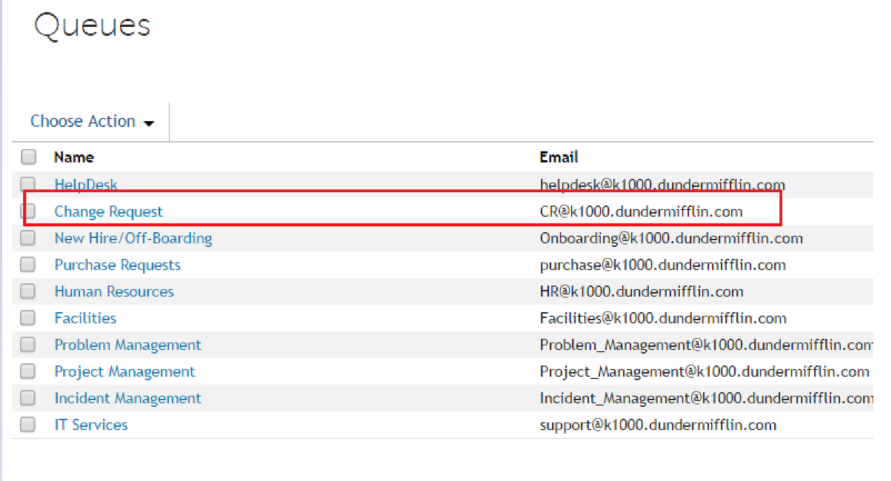
Create a New Queue for Change Requests
If you are using the KACE Service Desk today, you would create a new queue very similar to what you did with the initial setup of the help desk queue. You will also need to decide if you want to convert emails into change requests and if so, create a CR@yourcompany.com mailbox.
Create User Labels
You will need to decide who can submit a change request. If it can be anyone, then you can use the option for Allowing All Users as Submitters option. If you want to be more selective, you can create a label to include the appropriate people. You will also need to decide who can approve the change request and in this scenario, I would create a label called CAB and assign that to the Queue.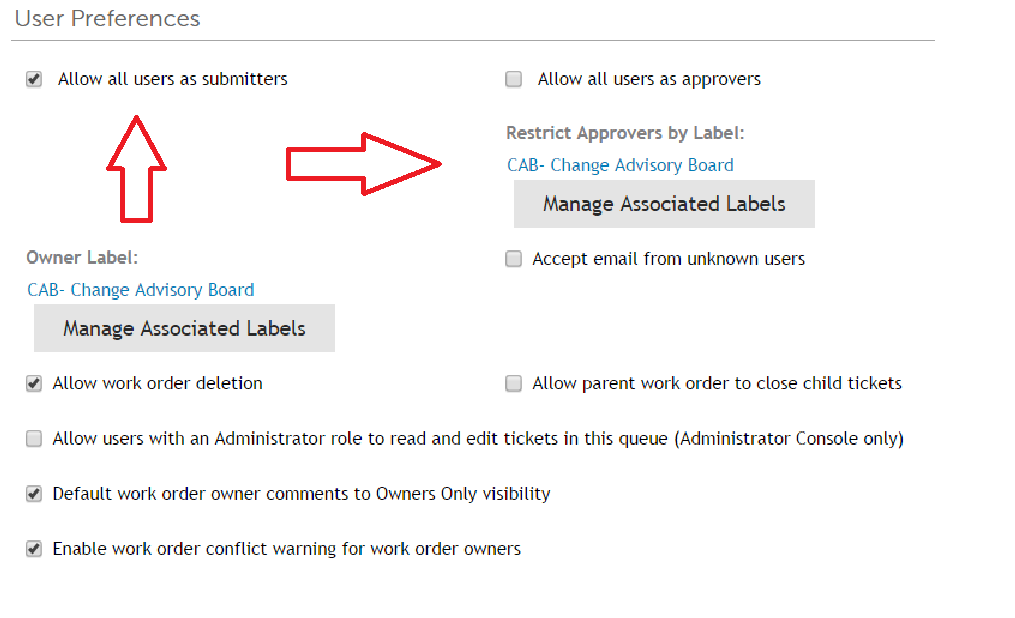
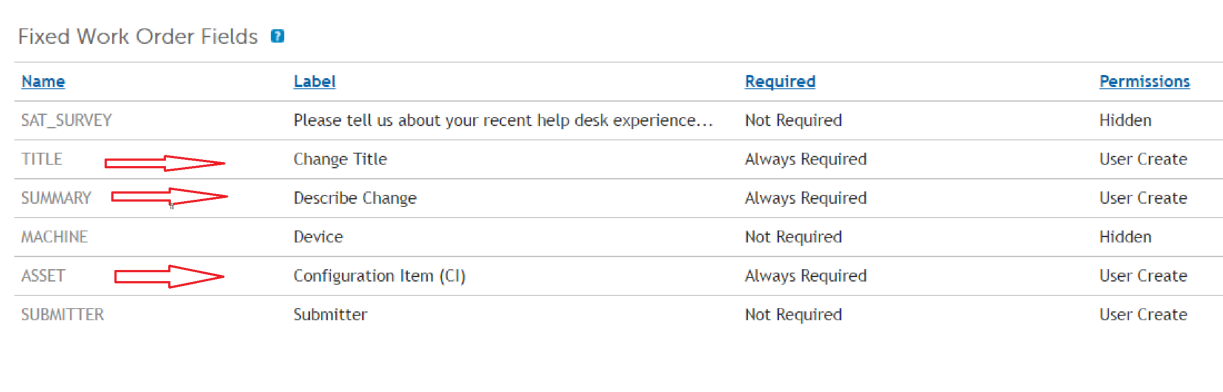
Creating The Form
One of the biggest advantages of the KACE Service Desk is how easy it is to customize. Not only can we create custom fields like Start Date, End Date, and Service Affected but we can also rename labels as well. Instead of using the field “Title”, I can use “Describe the Change”. Since a change can really involve anything, I would recommend hiding the “Device” field and only using the Asset field. I would also rename the Asset label and call it “Configuration Item” or “CI”. I can customize the impact values to be more change oriented such as Major, Significant, Standard and Minor. I can create statuses called Approved and Rejected. Since custom fields can also be a link, you could also potentially include a link to a shared calendar should you want to plan accordingly (directly from the change request). And one last item to mention, by default at a queue level, the approval field is hidden so you’ll just want to make sure that you unhide that option.
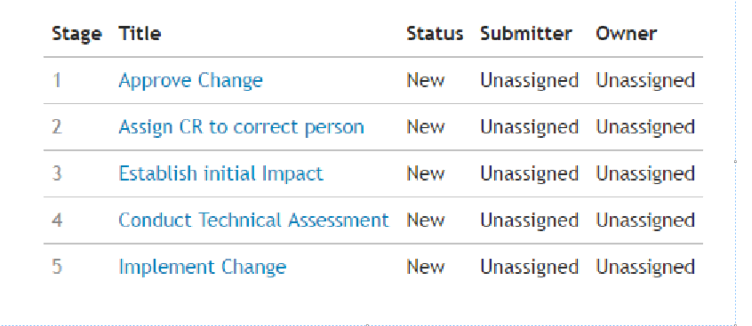
Creating Processes
This step is completely optional. Should you want to really define multiple stages that should happen as part of the change request, this is where you can use the Process section to define it. For instance, I may want approval first, then I may want the change request assigned to the appropriate person, then I may want to analyze the change, etc. All of this could be accomplished in one ticket for sure but if you are a larger organization there may be more stages involved and this is where our processes would come in handy.
Reporting
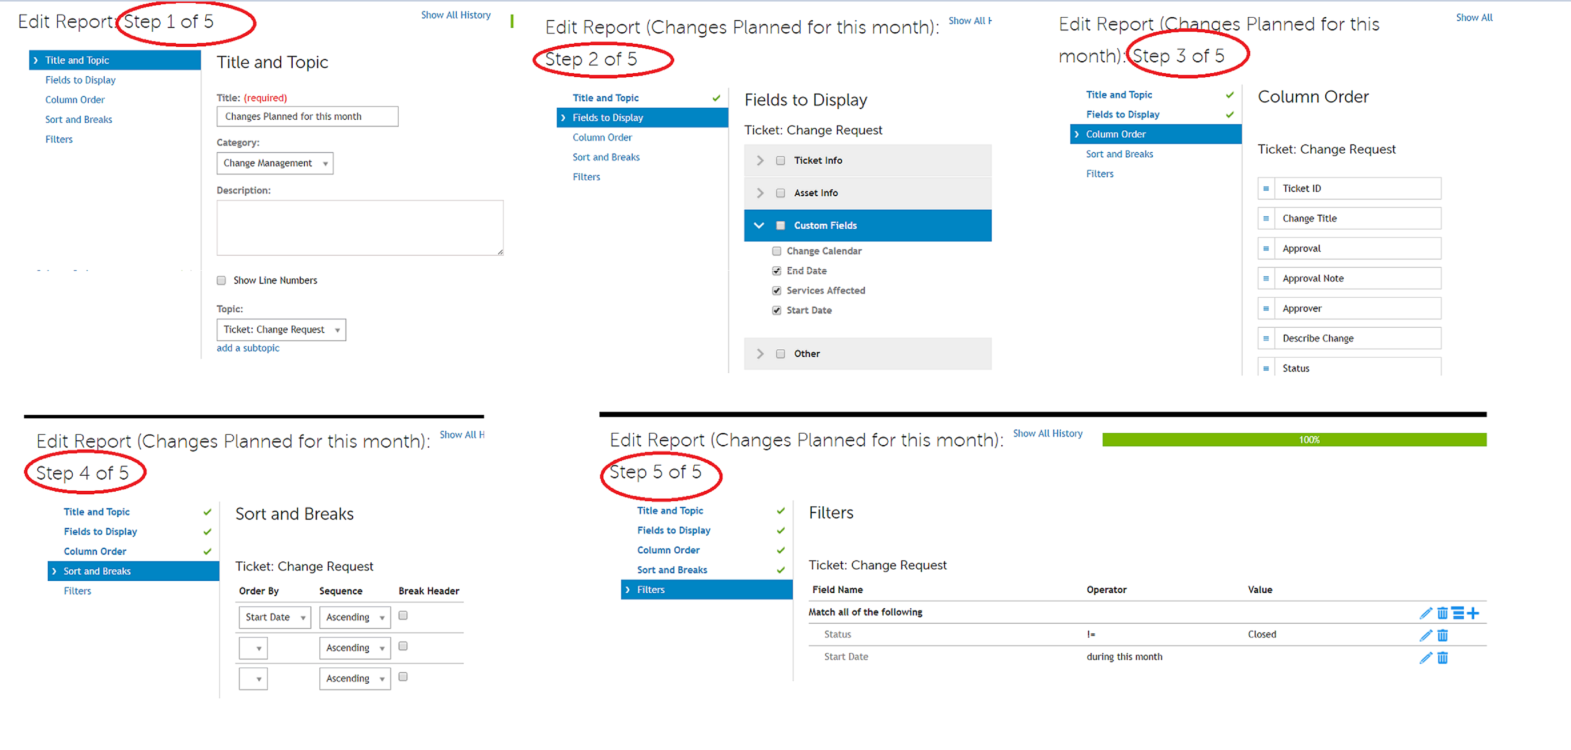
While KACE doesn’t have an integrated calendar, it does offer the ability to do custom reports. My recommendation would be to create the following custom report. This will allow you to see what changes have been planned for the current month. Go to Reports>>Choose Action>>New Wizard
Title: Changes Planned for this Month
Category: Change Management
Topic: Ticket: Change Request
Fields to Display: Approval, Approver, Description of change, impact, Start Date, End Date, Ticket ID, Category, etc.
Order by: Start Date: Ascending
Filters: Status Does Not Equal Closed and Start Date is During this Month
To sum this all up fairly quickly, the KACE Service Desk is so easy to use and customize, you can really build just about anything. It’s only limited by your imagination.

Comments